Karambit knives have a long and interesting history. Originating in Indonesia and used as a bold and threatening weapon, these knives pack some serious power. With their gorgeous inner-side curved blade, Karambits are exceptionally attractive knives and quickly earn their place in the enthusiast’s collection. Possibly the biggest challenge you’ll face is learning how to sharpen a Karambit knife.
Few other knives have a similar curved cutting edge on its inside edge – meaning your traditional whetstones aren’t going to get the job done. The good news is that – with the right tools and technique – learning how to sharpen a curved Karambit knife blade isn’t nearly as intimidating or technical as you might think.
In our guide, you’ll find a breakdown of the exact steps you need to follow, the tools you’ll need, and the correct techniques to get your Karambit battle-ready and as sharp as a razor. Let’s jump into the guide.
Everything You Need to Know About Sharpening a Karambit
As we touched on above, sharpening curved blades can be a challenge – especially if this is your first time. This is even truer for Karambit knives as their cutting edge runs along the inside edge of the blade. Your standard sharpening blocks won’t be able to get a good connection on the curved edge.
Luckily, there are tools and techniques we’ll teach you to get the job done right. We’re going to break this process down into 7 simple steps. We’ll litter in some free tips along the way to keep you on the right track. It’s important to know what your goals are before we learn how to sharpen a Karambit knife blade.
Make sure you understand the difference between sharpening and honing a blade, and just how sharp your blade needs to be. You’ll need to test how sharp the knife is to know your starting point and have an accurate reference for your progress. With these points in mind, let’s get started.
Step 1: The Basics (Starting Off Right)
There are a couple of basic practices that’ll ring true when you’re sharpening Karambit knife. Make sure you have good quality cut-resistant gloves made for sharpening and working on knives.
Here are a couple of other supplies we’ll need:
- Damp cloth
- Soapy warm water mixture
- Dry cloth
- White tissues
- White paper (for testing sharpness)
Perhaps the most basic and foundational step for sharpening any blade is to make sure it’s clean and dry. To get your blade clean, take the damp cloth and wipe down the entire length of your curved blade.
Make sure to get all the dirt and clumps off it. If this doesn’t do the job, you’ll need to use the soapy warm water and the damp cloth to clean it. Once you’ve got the blade clean, give it a thorough drying with the dry cloth. Now you’re ready to move onto the next step.
Step 2: Get the Right Sharpening Tools
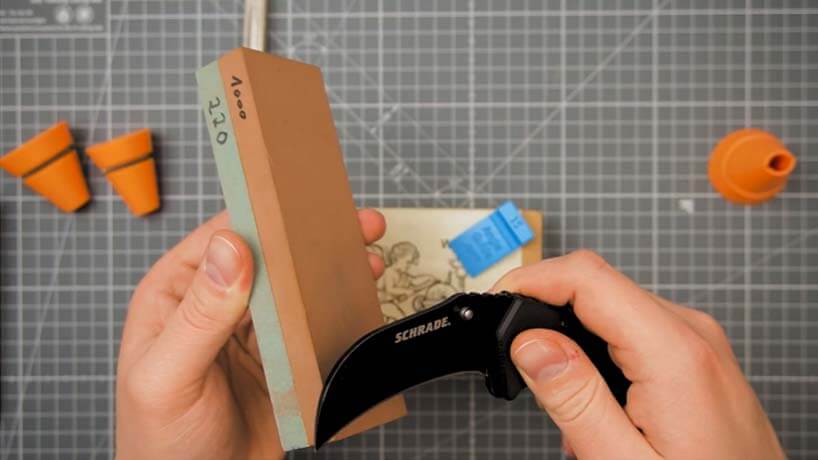
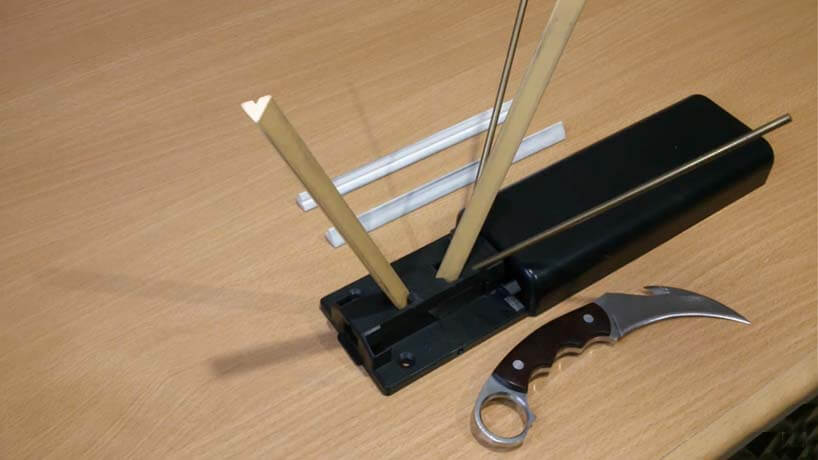
We’ve already discussed how traditional whetstones and sharpening blocks won’t cut it. You need a sharpening tool that can work on blades with an inside-curving edge. You need to get your hands on a round sharpening stone. There are plenty of options, but make sure you go with something small enough for your knife.
We usually get two different grits: one is a medium grit; and the other is fine grit. We’ll be starting with the medium grit stone. If – for whatever reason – you can’t get around sharpening stone, get the triangular ones, or a non-tapered sharpening rod. Make sure you get both medium and fine grit options (preferably from the same brand for consistency).
Get your stones setup on a flat clean surface and have all your equipment handy. If you’re using the triangular or circular sharpening rods, make sure they are firmly secured and set at a slight angle of about 15-25° (or whatever you’re comfortable with).
Step 3: Holding the Knife Right
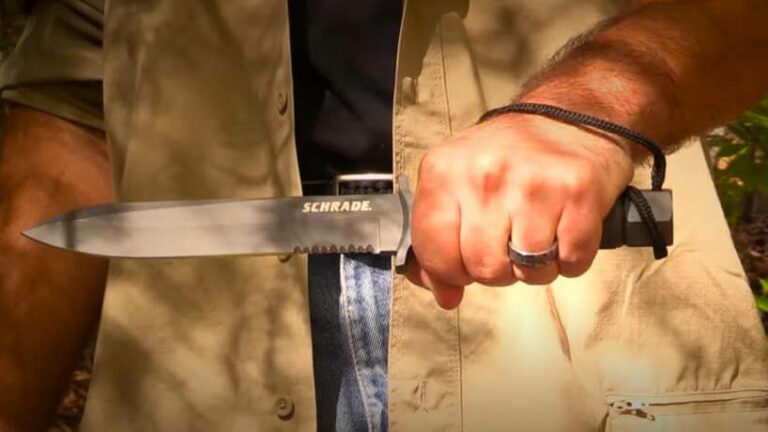
Get your protective gloves on and grab your Karambit. By now you should have your Karambit knife sharpener set up and ready for action. You want a firm grip on the knife, but not a deadlocked hold. There needs to be a little flexibility and give so that you can easily make small adjustments on the fly.
Try to keep the holding angle small – this means you don’t want to have the blade meeting the sharpening tool at a steep (closer to perpendicular) angle. This will help you more easily track the edge’s shine and progress. Before sharpening, test the sharpness of the knife again by cutting through some paper. The goal is to get it to cut through the paper without tearing it much. Now you’re ready to move on to (actually) sharpening the edge.
Step 4: Sharpen the Edge
Now you’re ready to start working the edge of the knife. There are a few basic sharpening principles to keep in mind here. You should always Karambit sharpen away from your body down and away if you’re using a sharpening rod. Try to get the whole edge in a single stroke. You should be counting the strokes to make sure you’re getting an even edge on both sides.
If you’re using a dual sharpening rod setup, alternate between the sides of the edge (one stroke on each). Our biggest tip here is to keep the strokes slow, steady, and relatively firm. You don’t want to drill the knife into the stone or rod, and you don’t ever want to strike it.
Place the bolster-side of the edge at the top of the rod or on the stone and go through the motion. Remember to keep the angle shallow and the strokes steady and consistent. Do around 20-30 strokes on each side of the blade and then do another sharpness test.
You should see a marked difference in how the edge cuts through the paper. This will also help you gauge how many more strokes it will take to reach the sharpness you’re after. Repeat this as many times as needed – but remember that we still have to swap out to the finer grit sharpeners to get the razor-sharp edges.
Step 5: Switch to a Fine Grit Sharpening Tool
The medium grit sharpening surface does a great job at getting the knife close to the desired edge, but struggle to get you over the finish line. This is why we told you to get some finer grit sharpening tools. Make sure they’re set up at the same angle and height to ensure consistency and congruency.
Using the same motions and stroke technique, work the Karambit’s edge in sets of 15-20 strokes on each side. Do the paper cut sharpness test after each batch of strokes to test your progress.
Pro tip: Make sure you wipe away the grit and residue as you’re sharpening. Use the white tissues and take a mental note of the amount of residue (for future reference). Wiping away all the residue should also be done with medium grit sharpeners, but is particularly important for the fine grit surfaces.
Step 6: Closing the Gaps

As you work through the fine grit sharpening steps, pay attention to any gaps between the blade and the stone. If you’ve been using a sharpening rod setup instead of a stone, this probably won’t be an issue for you.
To get those gaps the attention they need, use the edge of a rectangular or triangular sharpening rod to work the whole length of the blade. Make sure it’s fine grit and keep a very shallow holding angle. Repeat 10-15 strokes on each side of the blade. Test the sharpness after each batch until you reach the edge you want.
Step 7: Cleaning Up and Testing
You should have an excellent edge by now. Feel free to repeat steps 5 and 6 as needed. Give the knife a thorough cleaning with the warm soapy mixture and the damp cloth. Wipe it down until all the residue is gone the steel is shining. Dry the knife completely and put it through a couple of cutting tests. We like to cut a couple of pieces of material (an old t-shirt or pants) and some cardboard.
Clean and dry the knife one last time and you’re good to go! This process will get quicker and easier once you’ve done it a couple of times. Keep mental notes throughout the process. You can even write down what’s giving you trouble and work through them. You’ll be able to get an awesome edge in just a couple of minutes with a little practice.
Final Thoughts
Hopefully, you’ve taken a lot away with you. This is a very easy way to sharpen a Karambit knife once you’ve got a little experience. Read through the guide again if you need to clarify any cloudy gaps in your knowledge. The most important thing you can do now is to get some much-needed practice.
Take what you’ve learned on how to sharpen a Karambit at home get to work. Experience is one of the best teachers. With these tips and techniques, you’ll be getting an exquisitely sharp edge in no time! Good luck!

