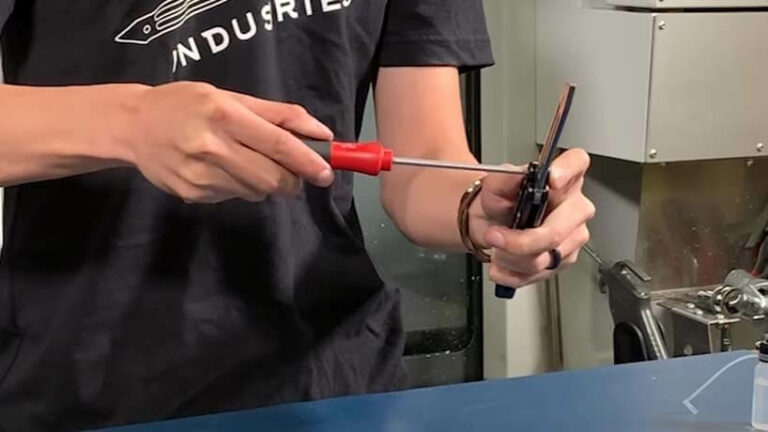
Polishing a knife isn’t as easy as you think. It’s quite complex and if you don’t know what you’re doing then it can turn sideways fast. Polishing requires the use of high-tech machinery that is powerful and can be quite dangerous. So safety becomes an issue as well as the technical side of how to polish a knife. It would be nice if somebody would be able to pick up a polishing cloth, wipe a knife clean and give it a nice shiny surface.
However, this is not the case because most knives are used more aggressively. The material that the knife is made from becomes damaged over time. When a knife is damaged it becomes a lot more difficult to polish evenly. Mainly because certain things like rust and dirt can get into the cracks and scratches. Machinery can attack the surface of a knife with much more accuracy than by hand. If you were to polish a knife by hand, yes, you would be able to but not without great difficulty.
It’s a very tedious process and quite simply, too slow. The amount of time it would take to achieve the same thing with the machine makes hand polishing not worth it. Trying to get into the cracks where rust has formed can leave you for hours trying to clean it out properly. Hand polishing does have its benefits but in this instance, we are going to refer mainly to polishing using machinery. The cost of machinery is high but for the amount of time it would save you, the investment is a no-brainer. Let’s get started on 8 things to watch out for when learning how to polish a knife.
Preparation
The first thing we need to consider before we even get to polishing procedures is to identify the correct components that we will need when polishing. Polishing requires certain compounds that will be used on the surface of the knife. In addition to that, there are buffing wheels and cutting compounds that will be needed in the process as well.
Polishing Compounds
Polishing compounds come in two different types, greaseless or grease-based. Both compounds have their added benefits. Greaseless come in two versions: solid or brush paste and they can last up to a year without being used. However, they should be stored properly. Greaseless compounds need lubricant to keep the blade material from breaking when polishing. Grease-based compounds have a much longer life span and can be used more aggressively when polishing.
They can polish surfaces that have been prone to more damage. This is because a coarser compound can be used which breaks down the surface faster. These compounds come with grit sizes ranging from finest to coarsest. Fine is the smallest and course is the largest. The best grit to start with is 500 to 600 because they’ll take off the smallest scratches. Grease-based grits should be used at this size. Anything larger should be greaseless.
Compounds To Look Out For
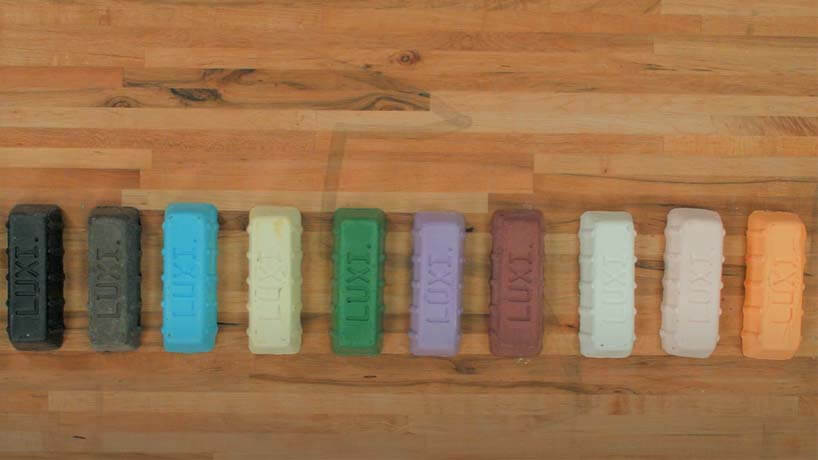
There are certain compounds that you need to look out for and these go by specific names. Here are some important ones:
Emory black – This is a useful compound for cutting action where not much power and speed are needed.
Color bars – These are compounds that are used after a greaseless grit has been used to remove small scratches.
Blending bars – These are similar to color bars and are primarily used to remove very refined scratches but with the difference of the use case scenario. This compound is used on a muslin wheel whereas a color bar is used for a dull finish on a sisal wheel.
White Rouge – This compound is the best mirror finishing compound in the business. The Rouge compounds fall under the buffing side of polishing. It is used mostly for polished finishes on brass, carbon steel, and fiberglass.
Green Rouge – This is a compound used for stainless steel and bronze.
Yellow Rouge – This is a very fast-cutting compound used for copper and nickel.
Most knives are comprised of stainless steel, so we will show you how to polish stainless steel knives primarily.
Buffing Wheels
The Buffing wheels are machines that spin at high speeds to evenly polish the surface of a knife material. Buffing refers to the connection between a wheel, the compound, and a knife surface. Buffing is where the cutting or polishing process takes place. Different buffing wheels have different effects on knife materials. The main types of buffing wheels are muslin wheels, sisal wheels, felt wheels, and satin bright wheels. Buffing wheels should always be run in the same direction. Make a mark on the wheel or on the side of the wheel to avoid making the era of using it in the wrong direction.
Muslin buffs are the most popular because of their versatility for general use. Sisal wheels are specifically designed for color bars. These should not be used with greaseless compounds or any rouge compounds. Felt wheels are easily adaptable and can be used for a variety of different functions. They are available in different densities making them versatile and easy to work with. They work well with greaseless compounds however not so well with the Rouge compounds.
Wheel Size
The size of the wheel is not something to make a huge fuss about. However, there are a couple of things to note beforehand. A larger wheel moves faster and so what would be a correct speed on a small wheel would mean a wrong one for the larger wheel. You could try a couple of sizes out yourself but we would recommend that you contact the supplier or an expert to assist you first.
Safety Tips
The first part of the process is of course making sure that everything is in a safe environment and that you are protected. These wheels spin at high speeds and can be dangerous if used incorrectly. All of the washers and major lock nuts and bolts must be securely fastened. If any of these lock nuts or bolts are loose then they must be tightened otherwise the wheel will fly off when turned on. The compounds used are abrasive and have a lot of friction meaning that if your hand touches it while spinning it will harm you. Use personal protective equipment like glasses, gloves, and a respirator or face mask.
Here we polish knives so we must have a firm grip on the knife while performing the procedure. Ensure that when the buffing wheel is turned off you refrain from touching it until it has completely slowed down. In terms of the safety of your knives, we recommend that you double-check which compound you are using otherwise the knife will get damaged. Some knives are much more flimsy and fragile so take care as to which one you have.
Method
Now that we have discussed most of what we will need, it is time to discuss the method. The different wheels and compounds that we’ll use when polishing must be further researched to make sure that you are using the right thing. If you aren’t confident that you are using the right thing then consult an expert to give you extra details.
Wheel Speed

The speed that the buffing wheel turns at is hugely important. This can mean the difference between a well-polished knife and a knife that is left in a worse condition than before. 1800 RPM is the go-to speed for basic knife polishing. This is because it is slow enough to accurately control how much of the material is being taken off during the polishing. 3000 to 3800 RPM is oftentimes too aggressive and is hard to control. There is a place for this although it should only be used for knives that have a lot of damage.
When using a higher speed, the polishing process happens at a much faster rate which is not always a good thing. So just remember that it is easier to take off material than to put it back on. This means that you should take your time because you cannot go back once you have made a mistake. A high wheel speed like 3600 RPM is perfect for use with a greaseless compound. Any finer compounds should be used between 1500 and 2000 RPM.
Procedure
Now let’s talk about the actual procedure to follow when you polish a knife. You will likely want to start with a coarser grit size for the compound then make your way up to a finer size. This might mean that you would start somewhere around 80 to 100 grit. To start with you should use a greaseless compound on a felt or muslin wheel. This will remove rust and larger unwanted dips and unevenness. Remember that each procedure will look different depending on what type of knife you have.
So this is just an example that can be used as a starting point. Next, you would move to around a 240 grit which is also a greaseless compound. This should be done on a muslin wheel to remove scratches that would have been created from the 80 grit. From here on we will be slowly getting finer from 300 up to 600 grit. Then we will use our color bars on a sisal wheel. The point of this step is to blend the scratches made from the greaseless compounds.
A few shallow scratches should be left over after this step but of course, this is not what we want our finished product to be like. So next we will use a blending bar on a muslin wheel to start to finely polish off some of the remaining scratches. After you are confident that the finish is starting to look better we will proceed to use white rouge. As mentioned before using white rouge is how to polish a knife blade to a mirror polish.
Mirror Finish And Wipe Down
To end the procedure all you need to do is grab a clean dry cloth. This is to remove all of the residues that formed during polishing. There is a black residue that forms when buffing. This is normal and is usually what happens when you use a rouge compound. You can either use the cloth to clean it or run it under some warm water. These residues are more prevalent when you have a dirty wheel, so to avoid this you can clean the wheel for future uses. When you’ve wiped it down fully, go outside and observe the mirror finish. It should be shining and reflecting light like a piece of silver lying in the sun.
Conclusion
The process of polishing is more complicated than one might think but it is not impossible. It just takes a little bit of time to get used to everything. In the beginning, a wheel spinning at high speeds while holding a knife near is quite scary. Not to worry; as time goes on you will develop the confidence needed. Polishing is about the fine-tuned adjustments on the wheel surface. If you are worried about messing up and possibly getting hurt then the finish will not end up being perfect. A steady hand is ‘the key’ to all of this.
Maybe you could practice a couple of times using other materials that are useless to you. Then once your confidence is higher you can move on to the knife. Remember that it is harder to put the material back onto a knife than it is to take it off. Continue to do more research and understand different compounds and different wheels. Who knows? You might even find that you are interested so much that you become an expert in the future.

