We’re going to show you the exact tips and processes you need to follow when you’re learning how to use a whetstone. Our goal is to help you get more professional results as consistently and effortlessly as possible. Hence, we’re going to give you tips and tricks you can follow throughout the guide to keep you on track and to help prevent unnecessary mistakes/injury.
Bear in mind that you’re working with a blade in slippery conditions, meaning you need to be mindful of your surroundings. Keep your workspace away from your kids/pets, or any possible distractions. You’ll also find what materials you’ll need to get the job done as quickly and efficiently as possible. Now with all of this in mind, let’s get started!
What Is a Whetstone?
In the past, a whetstone was the blanket term given to any sharpening stone – whether it was used with oil/water or not. Today, whetstone is the term used to refer to sharpening stones that are used with oil or water (most of the time). While there are a few exceptions, these aren’t too common and aren’t worth spending much time on.
To sum it up it’s enough to know that all sharpening stones that are used with oil/water are considered whetstones, but not all whetstones are used with water/oil. The word “whet” means “to sharpen” and has nothing to do with the meaning of the word “wet”. This is quite a common confusion point, so don’t worry if you’ve made this mistake too.
The Different Types of Whetstones

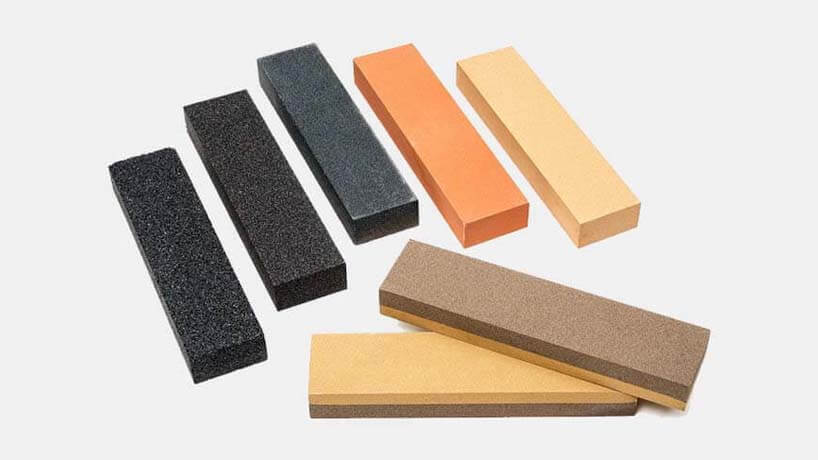
Aside from the difference above (that not all whetstones are used with water/oil) there are many different types of whetstone available today. The 2 main categories of whetstone are natural stones and synthetic whetstones. We’re not going to go into much detail about their material construction.
In short, all you need to know is that synthetic whetstones are more expensive, often more durable, but at the cost of not being as efficient at soaking water/oil. Natural whetstones are a little less versatile and customized. However they are quite a bit cheaper and do a better job at holding water after soaking. These days, both types of whetstone are exceptionally efficient and you will be able to get similar results if you have decent skills.
Choosing the Right Whetstone Grit Size
Grit size refers to the size and intensity of the tiny grains across the surface of the whetstone. It’s these grains that do the “sharpening”. When you’re choosing what grit is right for you, remember that coarse grit whetstones will take away more of your knife. Therefore, you have to be more careful with these rougher grits – or run the risk of taking too much off your knife and having to get it professionally repaired.
Medium and finer grit whetstones take less material off your knife and are better suited to mildly blunt knives and those that only need to be touched up. Also, rougher grits are represented by lower grit numbers, whereas finer grits are represented by higher numbers.
How to Use a Whetstone – Easy to Follow Steps
These are the steps you need to follow if you want to use a whetstone the right way. We’re going to throw in tips throughout the steps, so make sure you read through them carefully. Remember that if you aren’t confident – go slow. Because there’s no use going faster than your skills allow. Speed will build over time. Here are the steps:
Step 1: Required Materials
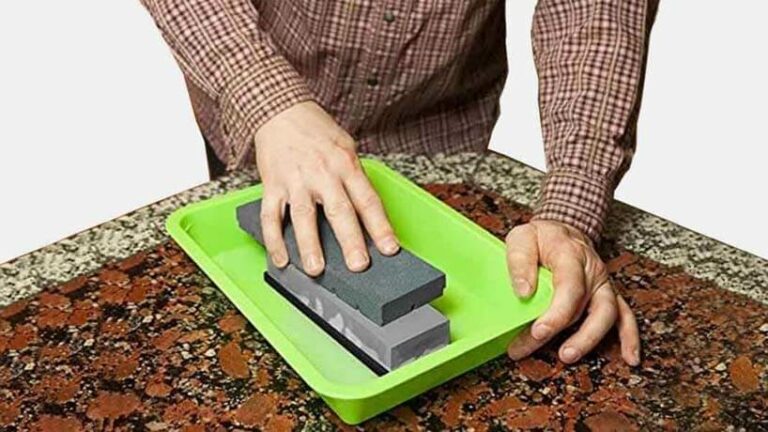
First make sure your whetstone has a rougher and finer grit (they’re on opposite sides of the stone). You’ll usually start on the rougher side and then switch after. You’ll also need a towel or non-slip surface to place under the whetstone. This will absorb the excess water and stop the stone from sliding.
Next, get a container full of water that’s big enough to soak the whetstone in, and another tub of water to clean the knife off. Additionally, you’ll need a couple of paper towels to wipe the blade down with between phases. We’d also suggest you get a piece of paper to do a cutting test with at each of the sharpening phases. Once you’ve got all these materials, move onto Step 2.
Step 2: Soak the Whetstone

You shouldn’t need to soak the whetstone for more than 5-10 minutes (often less). Place the whetstone inside the tub of water, making sure it’s fully submerged. You’ll know when it’s ready when all the air bubbles stop leaking from the stone. That means the stone is holding its maximum amount of water.
Additionally, if you have more than one stone, you can soak them together. It’s important to note that if you soak a synthetic stone for too long, it will reduce the stone’s strength and effectiveness – so remove it from the water once the air bubbles stop.
Step 3: Good Stone Placement and Work Area Setup
Fold the towel once-over and make sure it’s even. You don’t want to be working on a stone that isn’t sitting flat. For extra resistance, you can place some double-sided tape or sandpaper under the towel to stop it from slipping. Also, make sure the container with water for cleaning and the paper towels are within reach.
More importantly, you can also wear gloves if you’re working with oil or don’t want to risk cutting your fingers. Finally, once you’ve taken the stones out of the soaking water, you’re ready to get started.
Step 4: Coarse Grit Side or Fine Grit Side
You’ll need to use a little bit of judgment here – which is easier if you have some experience with whetstones. If your knife is severely blunt then you will need to start with a rough-grit whetstone, starting on the rougher side. On the other hand, if your knife only needs to be touched up and doesn’t need much sharpening (but it’s too much for a strop to do) then you should start on the fine-grit side of the stone.
Bear in mind that sharpening on the finer grit side is going to take significantly longer to sharpen the knife, so don’t freak out if you feel it’s taking a long time. Lastly, remember that when you’re sharpening on the rougher side, it’s better to work in shorter bursts and phases. The last thing you want is to take too much off the cutting edge as it’s very tough to fix.
Step 5: Good Sharpening Technique and Angle
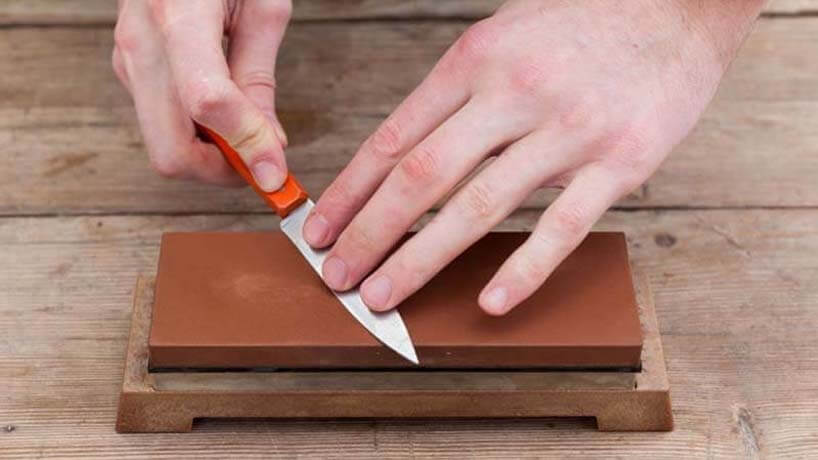
Place the knife’s blade flat on the whetstone so that it makes a roughly 35° angle with the whetstone (while still sitting flat). You want to be able to sharpen as much of the cutting edge in a single stroke as possible. With the knife in the right position, we need to find the right sharpening angle for your knife’s specific bevel. Here are some tips:
- Machetes and hatchets have a steeper sharpening angle of around 30°
- Large hunting knives, pocket knives, and outdoor knives at 25-30°
- Western chef knives and standard kitchen knives at 17-25°
- Japanese knives and other single-bevel knives at 12-17°
- Flat razors are sharpened at a 7-12° angle on a very fine-grit stone
These angles are just guidelines and the exact angle will depend on the size and shape of your knife. There are various techniques to find the exact angle of your knife’s grind, but these numbers are good enough estimates to start you off right.
Step 6: Sharpen the First Side

Place one hand on the blade’s tip (safely away from the cutting edge) and move the blade up and down along the length of the whetstone. Make sure each stroke is even (both push and pull motions) and consistent. Try your best to keep the sharpening angle steady while still sharpening as much of the cutting edge in one stroke as you can.
Do this for about a minute and then clean the knife off and inspect the edge. Finally, pay attention to the way the light shines off the cutting edge to make sure the grind is even.
Step 7: Flip the Knife Over
Flip the knife over and repeat the same process as in steps 5 and 6. Try to do the same amount of work on this side of the knife to ensure an even finish. Once you’ve matched the grind, clean the knife and wipe it down. Next, test the cutting performance and visually inspect the edge for imperfections.
Step 8: Clean the Knife Off and Check Its Sharpness
Repeat this cleaning and wiping process frequently to make sure that all grains and particles don’t grind between the cutting edge and the stone. Add water to the stone as needed to keep it slick. Repeat the sharpening steps on the fine-grit side of the stone until you are happy with the knife’s cutting performance.
Do the paper-cutting test at different parts of the cutting edge to test for an even finish. However, don’t expect a perfect cut through, as the edge still needs to be honed.
Final Thoughts
You should feel confident taking your knife to a whetstone – but like all things – practice makes perfect! Start slow and steady, building speed over time. This is a surefire method for getting the best possible results. Take what you’ve learned here and put it into practice. Now that you know the basics on how to use a whetstone, you’re already on your way to getting professional results and knives that cut like the day you bought them! Good luck!


