If you’re relatively new to sharpening stones and how to maintain them, this might be the first time you’ve heard of “flattening”. We’re going to cover all the important information you need before flattening your sharpening stone – as well as some healthy knife sharpening techniques that will boost your stones’ longevity.
You’re also going to learn why and when you need to flatten a stone, as well as the exact steps and techniques you’ll need to get professional results. We want your knives to get the treatment they deserve so that you can reach all your goals in the kitchen and beyond. If you’re an enthusiast set on improving your flattening technique or knife care, this guide is for you! Let’s get started!
What Is Flattening and Why Is It Needed?
Over time your sharpening stones will begin to show a dip near the center – just like an old mattress does. This tip is often the result of inefficient stone use and knife sharpening technique (more on that in a bit) and can be significantly reduced. Working with a non-flat surface on a sharpening stone can give you uneven cutting edges and can even damage your knives.
It makes it a lot harder to get consistent results and makes effective sharpening a tiresome task. Flattening involves using a flattening stone (usually around 180-grit) to “sand” down the uneven portions of your sharpening stone’s face. It brings the whole surface down to the lowest point so that there are no longer any dips or curves.
During this process, quite a bit of the stone’s surface is removed, which is why flattening shouldn’t be done often – especially on more expensive and higher quality stones. Let’s take a look at how to flatten a sharpening stone.
Takeaway: The need for flattening can be reduced or eliminated by using high-quality stone and an excellent, even knife sharpening technique.
How Often Does a Sharpening Stone Need to Be Flattened?
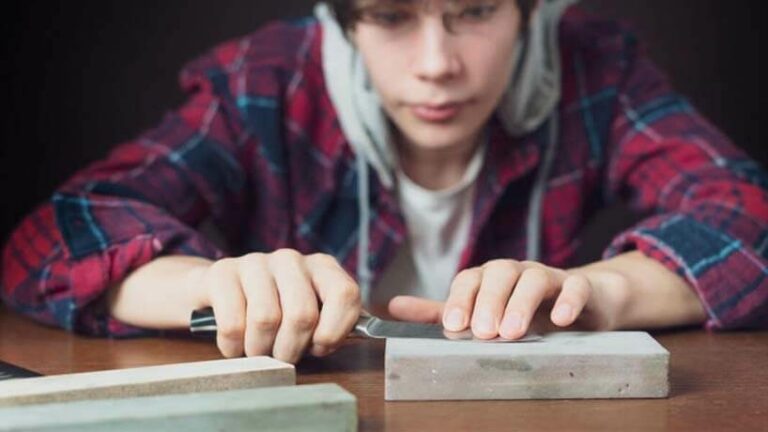
If you’ve got a high-quality stone and tip-top knife sharpening knowledge and technique – there’s a good chance you’ll never need to flatten it. I’ve had stones that have never needed flattening, and some that have worn very unevenly. This is largely due to my sharpening technique and can be avoided.
Make sure that you study up and refine your sharpening skills to ensure you’re using the whole surface area of the stone. This is the biggest change and improvement you can make if you want to get a significantly longer lifespan from your stones. There are many recommendations to flatten your stones after every 6-8 knives.
While there is some merit to this, your technique plays a more important role. With the poor technique, you might have to flatten a stone after every 5-6 knives. With great technique and even use, you might only need to flatten your stone once or twice during its lifetime – and maybe never at all!
Takeaway: Make sure you revisit your knife sharpening technique to ensure you’re using the sharpening stone’s surface evenly – both in terms of pressure and coverage.
6 Steps to Flattening a Sharpening Stone Like a Pro
Now we’re going to take a look at the 6 practical and easy to follow steps you can use to flatten a sharpening stone. If a stone needs flattening then we want you to do it right! A poor flattening technique can waste away several millimeters of quality stone that could hugely shrink your stone’s life.
Sharpening a knife might only take away <1mm of stone, whereas flattening will often remove 2-3mm (or maybe more). Here are the steps you need to follow. Pay close attention to any tips and techniques we teach you. Make sure you put them into practice and don’t try to rush through the flattening process.
Step 1: The Materials and the Setup
Before you even put the flattening stone to work, we need to make sure your setup is safe and functional. Start by placing a towel down under where you’re going to be working (on the table). This will stop your sharpening stone from slipping and sliding as you flatten it – a very important step if you want consistent results.
Make sure you have a container of clean water that is big enough to hold the sharpening and flattening stone. This is the container you’re going to soak the stones in. Have another bowl of water handy for rinsing and washing off the stone between flattening stages.
Get a pencil to draw your reference lines and some paper towels just in case. Make sure your workbench is at a comfortable height as you want the most consistent flattening angle and results. Once you’ve got all these materials together and you’re happy with your setup, move onto step 2.
Step 2: Draw Reference Lines
Draw 3-4 evenly spaced lines both horizontally and vertically across the stone’s top surface. Try to keep them straight and don’t press too hard on the pencil. You should avoid using a marker as the ink can sink a little deeper into the stone and offset the accuracy of your results.
We use these reference lines to keep track of the flattening process and to ensure we don’t take off any more of the sharpening stone’s upper layer than is necessary. You don’t need to draw any reference lines on the flattening stone. Now you’re ready to move onto step 3.
Step 3: Soak the Stones
This should only take a couple of minutes at most and need to be done before you start the flattening process. Soaking the stone is an essential part of the process and cannot be skipped. You should soak both the whetstone and the flattening stone for the best results.
Place both the stones in the clean water container we spoke about earlier. You’ll notice bubbles coming out of the stones – all you need to do is wait a couple of minutes for them to clear up. Once the bubbles are finished, take the stones out and move on to the next step.
Step 4: Good Flattening Technique and Tips

Place the sharpening stone flat on the towel we laid out earlier. Make sure it doesn’t slide easily and that it’s flat (work out any uneven bits in the towel’s surface. With the side of the sharpening stone that needs to be flattened facing up, place the flattening stone on it so that it sits flush.
You should notice quite an obvious curve and a space between the stones. This should be flat and touching by the time we’re done. Bear in mind that you should try to keep the stones wet at all times for the most consistent and even results. Start the move the flattening stone up and down the length of the sharpening stones.
Make sure you keep the pressure and each stroke as even and consistent as possible. You can also do light and small circular strokes for a change of motion, but make sure you don’t neglect any part of the sharpening stone – especially at the corners. Try to keep your hand centered on the flattening stone to ensure that the downward force is evenly applied.
Take breaks after every 10-20 seconds (less if you’re new to this) to check your progress. Pay special attention to the reference lines you drew in the earlier steps. You’ll notice they start wearing away the sides and top of the stone, and eventually at the center. Once all the lines are gone, your stone should be flat and ready to go.
Step 5: Rinse and Wet the Stones Frequently
Throughout the flattening process, try to rinse the stones off before getting back to work. This will help see more clearly and remove any residue that might increase friction or make the flattening rough/uneven. Keep the stones wet for best results. You don’t have to soak them fully again – just let them sit in the water for a couple of seconds after rinsing.
Step 6: Check the Flatness and Continue if Necessary
Adjust your technique as you inspect the reference lines and make your way through the flattening process. If you notice you’re not doing enough work on some areas of the stone, pay a little more attention to that area – just don’t go overboard.
Once the last of the reference lines have been removed, lie the flattening stone and the whetstone flush again (as in step 4) and make sure they are touching. There might be a tiny gap, but this isn’t serious. If the gap is still big (but smaller than before), draw on new reference lines and repeat steps 4 to 6.
Final Thoughts
You have all the information and knowledge you need to get professional flattening results. Take what you’ve learned about how to flatten a sharpening stone and put it into practice. Take it slow and steady, building up speed as you gain confidence and experience. Pay close attention to your technique and safety and you’ll have great results in no time! Enjoy putting wicked sharp edges on your knives and good luck!


