Tanto knives pack the raw piercing power that many knives (and their owners) dream of. Many people go wrong because they don’t know how to sharpen a tanto blade because of its unique shape. They end up with rounded cutting edges that can’t slice a carrot. We’re here to help you get sharper edges, with the right technique, so that your tanto knife cuts like it’s new.
We’ll show you the steps you need to follow, and litter in a few helpful tips and pointers to keep you on track, and from doing unnecessary damage to your knife. By the time we’re done here, you’ll be ready to whip out your tanto knife, and put an edge on it that would impress even a devout knife enthusiast. Let’s take a look at how to sharpen a tanto blade knife!
What Is a Tanto Knife?

Tanto knives were inspired by traditional Japanese blade designs. If you take a look at more commonly known Japanese masterpieces such as the Katana, you’ll notice a lot of similarities between the tips of the knives. Tanto knives have been revisited and reimagined countless times over the years, leaving us with the modern tanto blade.
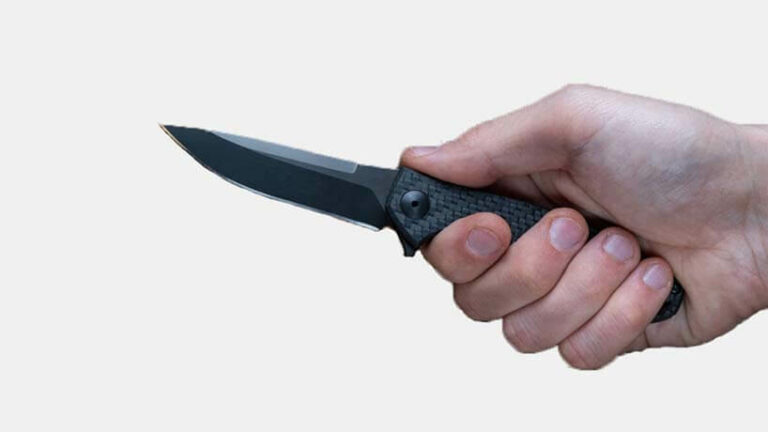
While you find them being used on the battlefield to shred through armor, they still have versatile use and a very functional foundation – making them excellent utility and EDC knife (but more on that in a bit). Tanto knives have a very distinct and unique squared look. They don’t have the gentle curves and convex/concave cutting edges that many pockets and fixed knives have.
It’s their unique “boxy” design that gives them extraordinary piercing power. The tanto blade is made up of mainly straight cutting edges. The blade extends from the handle, shooting out at a slight angle (but still straight). This straight edge changes direction near the tip rather sharply, leading the blade and the cutting edge toward a sturdy and powerful tip.
The cutting edge after the “corner” is also very sharp, and so is the tip. Tanto knives have a very straight and strong spine. This is what gives them their distinctive power advantage over most other similar-size knives. It’s also common to find tanto knives that have a mid-sized hand guard where the blade and handle meet. This helps improve the safety and control during more aggressive piercing and prying.
Purpose of a Tanto Knife
As we’ve already pointed to, tanto knives are excellent piercing knives and they’re one of the very best in their size and weight class. This is mainly due to their strong and straight spine, which is consistent and doesn’t taper toward the tip (with most tanto knives).
The tanto tip has quite a bit more steel behind it than most similar-sized knives and this gives it loads of extra support needed for heavier cutting and piercing. While the tanto is used mainly for utility and EDC use today, this wasn’t always the case.
Their powerful piercing ability and strong cutting edge lent to excellent defensive capability. Tanto blades were often carried as secondary weapons by soldiers and used in close quarters – almost like a dagger. Nowadays, you’re not going to find armored opponents battling it out on the streets.
You’ll find the tanto on the belts of outdoor adventurers and utility-minded knife enthusiasts. They’re mainly used for utility tasks like cutting, prying open boxes, prodding and piercing, and much more. Their strong and sturdy blades make them versatile and super-functional.
Why Are Tanto Knives Tricky to Sharpen
This is mainly due to the sharp turns in the cutting edge around the tip. There are a few areas where sharpening a tanto knife is easier, such as the cutting edge being straight and not curved. This makes the blade relatively easy to sharpen once you know the basic technique and steps to follow on how to sharpen a tanto blade.
You don’t need to worry about matching the curve of the knife, though there are some important considerations before getting started. Most people run into issues when they try to sharpen the tanto knife as a single edge. They try to sharpen the whole cutting edge (including the bend) in one go. This rounds off the cutting edge and weakens the strength of the bent edge.
How to Sharpen a Tanto Blade – The Steps
Now we’re going to break down the steps and materials you’ll need to get the job done right. Bear in mind that if you own a high-quality tanto knife, you should only use high-quality sharpening stones with excellent technique. Here are the materials you’ll need before getting started:
- Good-quality sharpening stones at varying grits from rough to fine
- Tub of clean water for soaking the stone
- Paper towels for wiping down the blade
- Water spray bottle to keep the stones wet
- Towel to stop the whetstone from slipping
- Paper for cutting tests
Step 1: Soak the Stones and Set Up Right

Place the tub of clean water on your workbench and place all of your whetstones inside. You’ll notice bubbles streaming out of them. This is expected and you’ll need to wait until the bubbles stop (meaning your stones are properly soaked) before you get to work. As your stones soak, lay the towel down on your workbench.
Make sure it’s flat and doesn’t have any major folds in it. You want to stone to sit as flat as possible and don’t want to sharpen your knife at an offset angle. You’ll place the stones on this towel when we move to the next step. Make sure your water spray bottle is nearby so that you can regularly spray the stones to keep them wet.
Dry stones can be easily damaged and can ruin your knife’s cutting edge. Once the stones are soaked, and you’ve set your workbench to a comfortable height, it’s time to move onto the next step.
Step 2: Good Sharpening Technique
We’re going to briefly take a look at 2 different sharpening techniques for different skill levels. Place your whetstone on the towel, with the shortest side facing you. Give it a spray or two with the bottle and get your knife ready. The first method is if you’re relatively new to knife sharpening and don’t have muscle memory build up yet.
Place the knife flat on its side and perpendicular to the whetstone. Hold the handle in your dominant hand and use your left hand to control the blade. Raise the blade slightly off the stone to around a 25-30° angle. You should match the angle of the cutting edge (right near the sharp part of the knife) so that it sits flush.
This is your optimal sharpening angle and needs to be maintained as closely as possible while sharpening the tanto. Starting at the bottom of the sharpening stone; slide the blade up the length of the stone (away from the blade and not into the blade). As you slide along the stone, gradually drag the knife diagonally, making sure not to round the pointed bend in the knife. That is one stroke.
Rinse and repeat, then flip the knife over and do the same for the opposite side of the cutting edge. The second method uses the same technique and holding method as the first – except that you should sharpen into the cutting edge. Only do this method if you have excellent technique and muscle memory for the stroke. You’ll get faster results but there’s a risk of cutting into the stone.
Step 3: Work Up the Grits
Start at the lowest number-grit stone and get the edge you want. Once there’s an even burr (a lip over the edge), you’ll know it’s time to flip the knife over. Only move up to the higher grit once the grind is even and light reflects off it evenly (and there is no burr on either side.
Step 4: Don’t Forget to Sharpen the Tip
You’ll need to treat the section after the bend in the cutting edge as a separate knife. Use the same technique and sharpening angle that you did for steps 2 & 3. Make sure not to round the point where the knife bends. Just sharpen each section individually and you’ll be good to go.
Step 5: Cutting Test and Inspection
Make sure there is no burr on either side of the cutting edge and that it comes to an even and consistent point. Test the cutting edge’s performance by cutting through a piece of paper – making sure to test all parts of the cutting edge (especially after the bend). Take the knife back to the rougher whetstones if you need to make any adjustments to the edge, as the higher grit stones won’t fix the issue.
Step 6: Strop the Cutting Edge
Use a leather strop to put the best possible edge on your tanto knife. Use the same holding technique and stroke as the sharpening – but with a shallower sharpening angle. Steeper angles can damage the strop, which is why a slightly shallower angle is best.
Final Thoughts
Now that we’ve gone through the basics of how to sharpen a tanto blade, you should feel confident sharpening your own tanto knife now. Take what you’ve learned here and get some practice. Whether you’re experienced or not, we’ve got techniques and tips you can use. Good luck with your sharpening and try to have fun while doing it!


