Learning how to hone a straight razor isn’t as simple as stropping the blade. Razors have incredibly fine edges that need precise techniques and tools to best their best performance. When you look at a razor’s edge under a microscope, you’ll notice grooves along its edge. These grooves give the razor its impressive cutting prowess.
As the blade dulls, the grooves wear down – and there goes your silky smooth cutting. Here you’ll learn the 4 steps to sharpening a straight razor, why it needs to be done, and the technique/tools you’ll need. Let’s get into our straight razor honing guide!
Why Straight Razors Need Honing
As we hinted at above, the micro-serrations give the razor its unique cutting and slicing power. These grooves flatten as the edge wears – rounding off the fine pointed cutting edge. Stropping the edge does nothing to slow this rounding process. The sag in a leather strop helps to realign the steel, but can’t get its bleeding edge back.
That’s where straight razor honing comes in. It takes away a little bit of steel, letting you lead the cutting edge to an impeccably thin point. If you’ve been stropping your straight razor for a while, there’s a good chance you’ll need to hone it. Stropping and honing work hand-in-hand and they can’t do the other’s job.
You’ll need a combination of both if you want to get extreme performance from your straight razor. If you want to know how often to hone a straight razor, you’ll need to inspect the edge under magnification. Note the dates you hone it and use that as a guide for the future (based on the same usage frequency).
Types of Stones for Honing

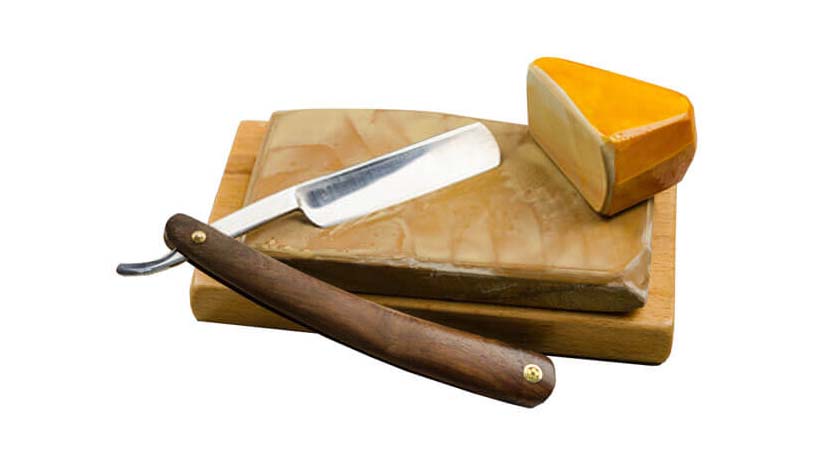
Two types of honing stones are used nowadays. The first (and most widely known) are tradition honing stones. These have a high silica content, giving you a very fine grit that puts a solid edge on your razor. Synthetic honing stones are the other type.
You’ll find synthetic stones that have diamond or ceramic worked into them and can give you almost identical (sometimes superior) edges compared to traditional stones. Using a high-quality honing stone is especially important when learning how to hone a new straight razor that you haven’t worked with before.
Regardless of the type you choose to go with, a high-quality sharpening stone has a perfectly flat surface with no seams or imperfections. They’re usually used wet – either with water or oil. This helps to keep the stone from getting too hot and messing with the temper of the steel and to keep particles from drifting into the microscopic pores on the steel’s edge.
How to Sharpen and Hone a Straight Razor in 4 Steps
We’ve broken this process down into 4 actionable steps that you can get started with right away – no matter your skill level. If this is your first time sharpening a razor, take your time, and don’t feel you need to rush learning the techniques. Experience is an excellent teacher and you’ll learn what works best for you over time. Here are the tools you’ll need to get started:
- 12x magnifying loop
- Water for the honing stone
- Something to dry the razor with
- 1k, 3k, 6k, 12k honing stones
- Bright work light
- Tape for the blade’s spine
- 120-micron DMT plate
Get these tools together and move on. Remember not to skimp on the quality of the honing stones – you don’t want to ruin the edge on your razor. Let’s learn how to properly hone a straight razor!
Step 1: Decide Which Stones and Grits to Use
For this guide, we’ve chosen four different grits. We’ll be using a 1k grit to do the bulk work. The 3k, 6k, and 12k will put an extremely fine edge of the razor. Your sharpening technique or method won’t change as you work on different stones. It’s important to point out that you should fix all errors with the rougher 1000-grit stone.
You’ll save a lot of time of effort compared to working with the finer grit options. As you move onto the higher grit honing stone, it’ll become increasingly important to pay close attention to the scratch patterns. They’ll guide you through how much work you’ve done and are the best source of feedback.
Step 2: Prepare the Honing Stones
Lay all your honing stones out in order of their grit. Hand-draw cross-sectional “X” shapes across the sharpening surface. We need to remove this top layer and this is the best way to show our progress. Thoroughly wet the honing stones. Be generous with the water/oil and make sure it covers the sides too. You should be working inside a tray that holds all the water.
You’ll need the 120-micron DMT plate here. This will take off the top layer as evenly and smoothly as possible. Lay it flat on the wet honing stone and start rubbing. The goal is to remove all the cross-sectional lines we just drew. Use water to wash the surface of the honing stone and the DMT plate. Check to make sure all the lines are gone. If they aren’t, keeping rubbing at it with the plate until it’s clear.
Holding the DMT plate at a 45° angle, round-off the shoulders of the honing stone. We do this to make sure there isn’t a squared edge to catch the heel of the razor as we’re honing it. Throughout this process, make sure the plate has plenty of water on it and that you wash off the DMT plate between “rubbings”. Repeat this step for all four (or as many as you choose) honing stones, then move on to the next step.
Step 3: Get the Right Honing Technique

The first thing we need to do is tape the spine of the razor. You want the tape to be in line with where the handle meets the blade. This tape will help stop you from wearing down the spine while honing – which in turn ruins your honing angle and the edge you’ll get.
Wet the 1k honing stone again and lay the straight razor flat on its side. Both the spine and the edge should be touching the stone. Draw the blade steadily in a controlled motion across the honing stone. Hone into the blade, not away from it. You can use a quick back and forth motion as long as you go from hill to till.
Paying too much attention to one zone can give you an uneven edge. Make sure to mix in some long steady strokes across the honing stone (into the blade). When you reach the end of the stone, flip the knife over using the spine as the pivot. Don’t flip it over on the edge-side as you can accidentally tarnish the edge.
One of our best tips to hone a straight razor is to keep each stoke – pull or push – consistent. Aim for the same speed, strength, and length of each stroke. If you’re confident in your skills, you can work with two-hands. This will be faster and more efficient – but more likely to give an uneven finish.
Step 4: Dry and Inspect the Razor’s Edge
Once you’ve had a few runs with the 1000-grit stone, you need to dry and inspect the razor’s edge. Dry it thoroughly. Hold the blade near your work light and angle it so the light reflects toward you. Grab your 12x magnifier and inspect the very edge of the blade.
We are paying attention to light reflections coming from it. If you see any shiny spots it means it hasn’t been honed. Honed edges won’t reflect much light. Make a mental note of the areas that need more work and take the razor onto the 1000-grit honing stone.
Repeat the process and inspect it again. Once you’re happy with the finish, it’s time to move onto the 3000-grit honing stone. The technique you use will be the same as step 3. Work through the process and take inspection breaks. This is where your focus will change a little.
Instead of inspecting light reflections, you need to focus on the scratch patterns. Get them looking even and consistent along the edge of the blade. If you notice any spots that need work, don’t go onto the 6000-grit stone until you work them out.
Once you’re happy with the scratch patterns, move onto the 6k honing stone and repeat the process and checks. If you want to go all the way, you can take your razor’s edge to the 12k honing stone. Be warned that progress is slow, so be patient. It will put a world-class edge on your razor and we think it’s worth the effort.
Final Thoughts
You should feel comfortable honing your blade now. We’ve covered a lot of information, so feel free to take your time at work through it at your own pace. All that’s left now is to take action. Use what you’ve learned here on how to hone a straight razor and put it into practice – and enjoy the silky-smooth cutting edge after!


