If you’ve ever used a truly sharp knife, you’ve felt that exquisite moment as the knife glides through whatever you’re cutting like it’s a cloud. Knife enthusiasts yearn for edges like this and entire industries have been built around achieving it. This is where stropping comes in. Before using a knife that had been properly stropped, I didn’t even know this technique existed.
I remember thinking it was the most expensive steel on earth. Turns out the owner just knew how to strop a knife. We’ll show you the techniques to use with our easy-to-follow 7-step guide. You’ll find out exactly what you need and where to start. Let’s learn how to get knife edges that would make a chef’s eyes light up!
What Is Stropping a Knife?
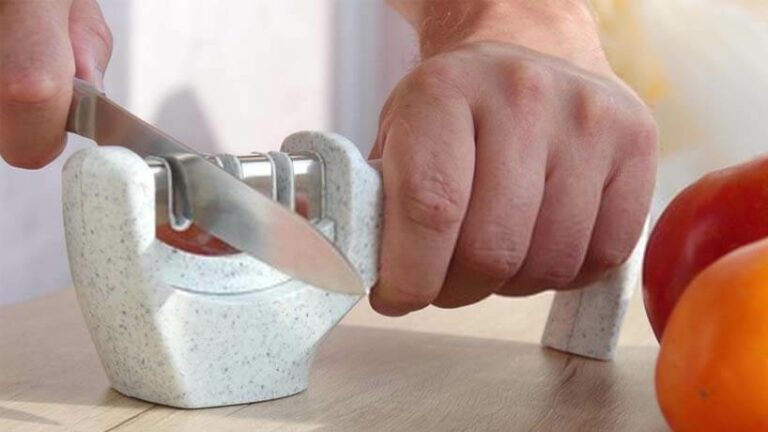
Knife stopping is what takes a knife edge to impeccable levels of sharpness simply not achievable with a whetstone or sharpening rod. Stropping refers to anything other than a sharpening stone or rod that’s used to sharpen or hone the edge of a blade. The type of stropping we’ll be talking about in this guide is leather stropping.
As with your belt, leather strops have two sides. One side is smoother and more polished, while the other side (think of the inside of your belt) is rough and rugged. These leather surfaces are often coated in an abrasive compound that binds with the leather and gives your knife a polished and refined finish.
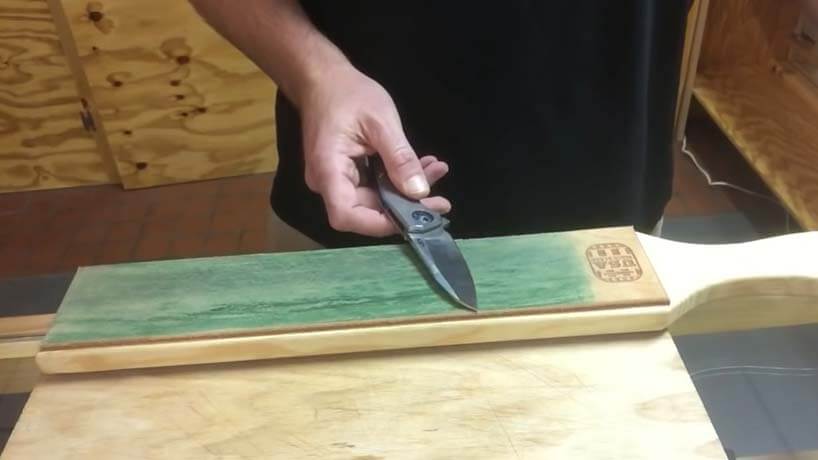
You’ll find different compound grits and strop designs. The most popular are hanging strops (this is how to strop a knife with a belt), bench strops, and paddle strops. The process involves running the edge of the blade along the leather’s surface to remove the waste and burrs left behind after sharpening with a whetstone or rod.
Stropping doesn’t realign or remove any steel as sharpening does. It should always be used after sharpening (unless you have a convex edge) and gives you the sharpest possible knife edge. Now, let’s take a look at the steps and techniques you’ll need to hone your blade’s edge to its finest!
How to Use a Strop to Sharpen Knives

Here we’re going to look at how to strop a blade by breaking the process down into 7 steps you can follow from home. Start by getting the following materials together:
- Flat and clean surface to work on
- Bench or paddle strop
- 3 strop grits ranging from rough to very fine
- Tissues to wipe the blade down
- Work gloves if you’d like the added protection
Step 1: Get the Right Stropping Angle
Start by testing the best angle for stropping your knife. To do this, place the knife flat on the strop so that it makes a “+” shape with the strop. Rotate the knife so that the spine lifts off and the edge remains on the leather. Start with a relatively shallow angle as you slide the knife across the leather.
Don’t put too much force. If the blade catches the surface of the leather, the angle is too steep. Find the point where the angle is slightly shallower than the point where these catches happen. This is the best angle to strop the edge at.
Pro tip: You can also take a black sharpie and draw a line along the edge. Do a couple of strops and see if the sharpie has come off. If it hasn’t, the angle is too steep. Now that you have the best sharpening angle, let’s move on.
Step 2: Get the Right Grit Strop
We’re going to start with the roughest grit leather. If the strops you’re using are infused with a compound, then it’ll most likely be the black colored one. The green color is finer and the white color will be the finest. You’ll do a couple of runs with the black grit to work out all the waste and burrs left by the sharpening. The lighter grits will do more of the finesse and polishing.
Take note of which side of the leather you’re going to be using. If you’re applying the compounds yourself, put the green (mid-grit) on the smoother side and put the black compound on the rougher side. Place your bench/paddle strop down on the flat working surface so that the longest side is perpendicular to you. Grab your knife and move on to the next step.
Step 3: Use the Right Stropping Technique

Place the knife flat against the surface of the leather so that it makes a 90-degree angle (like a “+” sign) with the strop. Slide the knife (with your handle hand) across so that the handle-side of the blade is on the leather. Move the knife to the far end of the strop and raise the spine off of the leather while leaving the edge touching. You want it at the angle we tested for in step 1.
Now let’s move onto the stopping. Keep the pressure light and consistent and remember to keep the angle steady. We’re going to be sliding away from the knife’s edge, not into it. As you pull the knife toward you, remember to steadily move it across the leather so that the entire length of the edge makes contact at some point. Reset the position and repeat. This is one stroke.
Step 4: Don’t Forget to Strop the Tip
Now is a good time to point out the technique for stropping the tip of the knife. As you reach the end of the stroke from step 3, rotate the blade so that the tip makes contact. Keep the angle and the pressure as consistent as possible. This will work the tip and make sure any roughness it worked out. You won’t need to do this on all your knives and it depends on the tip style.
Step 5: Get Both Sides of the Blade
Now that we know how to do a successful stropping stroke and take care of the tip – it’s time to repeat it all. I like to work in sets of 20 strokes for each side of the edge. Keep the angle and the pressure as steady and consistent as possible. If you want to be professional about it, you can alternate between strokes starting from your side, and ones starting from the far side (on the same edge of the blade of course).
You’ll repeat this process for the opposite edge of the blade. Stick to the same number of strokes and inspect the edge and tip after each set. You can do a sharpness test on a piece of paper. After a couple of sets, you’ll get diminishing results and will need to move over to the finer grit strops.
Step 6: Switch to a Finer Grit
Now we’re going to use the green compound strop or the smooth side if you’re not using compounds. Repeat the sets of 20 strokes for each side of the edge (or alternating 10 x 10) and do tests after each one.
This is the step that’ll get the edge razor-sharp, so be careful if you’re testing the sharpness with your thumb. Keep the angle steady and the pressure light throughout. Once you’ve done a couple of sets, you’ll be ready to go. Your knife should be ultra-sharp and ready to go.
Step 7: Bonus Tip
If you want to go all-out and get the sharpest possible finish (and a gorgeous polished edge) then grab an even finer grit strop (white color compound). Do one or two stropping sets and use the tissue to wipe the blade down. We don’t advise touching the edge now as it’s sharp enough to cut open the fabric and space and time. Jokes aside, the edge will exceptionally sharp, so tread carefully.
How to Apply Compound to a Strop Knife
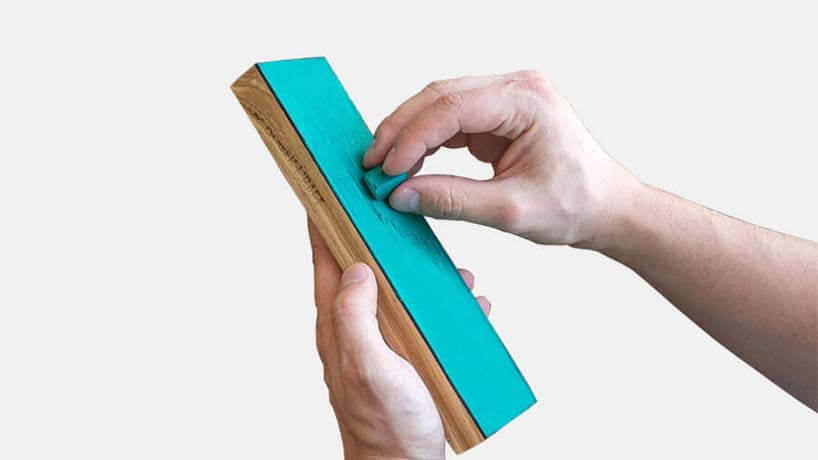
The compound is applied almost the same way a crayon is used to color with. Heat the compound a little to soften it and make it easier to apply. You don’t want to put too much on, so don’t lather it. Search up a couple of pictures online if you’re not confident.
Use the edge of your knife (at a narrow-angle and moving away from the blade’s edge) to press the compound into the leather. Do this a few times and give it some time to settle. If you’re learning how to strop a knife with a belt and want the compound, you’ll need to secure it and keep it sitting flat. A couple of elastic bands and a block of wood should do the trick.
Final Thoughts
Now that you’ve got a clear plan on how to properly strop a knife, you’re ready to get some practice. Take a little time to fill in any knowledge gaps you still have. If you’ve never stropped a knife before, get ready to be blown away by the results you’ll get.
Just remember safety is important and you’re dealing with devastatingly sharp edges, so take care. Take the steps and techniques you’ve learned on how to strop a knife and get some practice. Let experience be your guide and enjoy working on your knives – good luck!

