Pocket knives are getting more complicated and intricate as time goes on. With all the options available to us, even an enthusiast has trouble getting used to all of them. We’re going to focus on the lock types and how they’re found on today’s most common pocket knives. From the simple to the complex, we’ll teach you how to handle them and build up the speed you need. You’ll learn how to close a pocket knife – regardless of the lockup type. Let’s jump in!
6 Pocket Knife Lockups You Should Learn to Close Safely
We’re going to look at 6 of the most common pocket knife lockups. We know there are many more, but we want to get you started down the right path and building up a solid foundation. You’ll we informed and able to move on to more complex locking systems once you’ve nailed these. We’ll give you a little background knowledge on each of the lock types, how they work, and how to close a pocket knife safely – every single time!
Linear Lock Pocket Knives
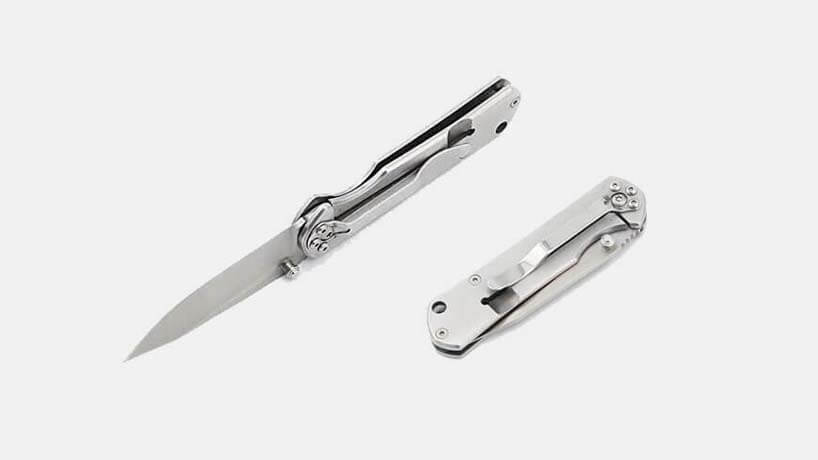
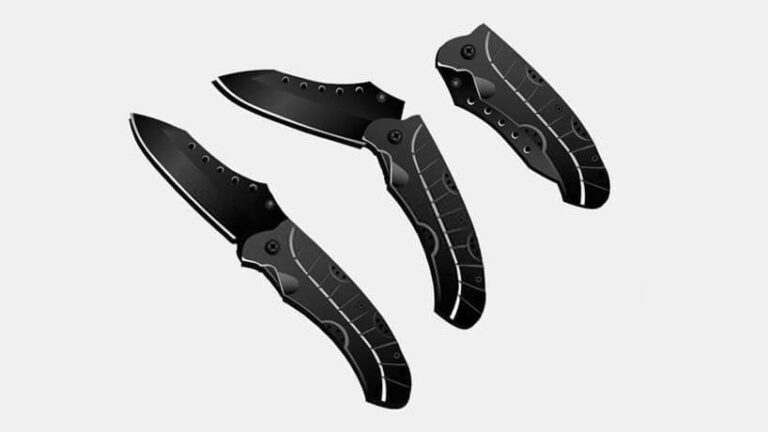
Knives that use linear locks are usually constructed with a fixed linear piece and a bent (movable) linear piece. They’re set with a scale on either side. The slightly bent locking piece rests against the closed blade. As you open the blade, this piece slips under the tang and clicks into place – securing the blade in its open position.
You’ll find this lockup to be one of the most common and widely used. Thankfully, they’re exceptionally intuitive and it doesn’t take you long to build up jaw-dropping speed. These are manual knives, meaning you’ll have to manually push the blade out of its locked position.
To close a linear lock, hold the pocket knife in your hand as you usually would. Use your thumb (from your hand holding the handle) to push on the linear lock. There’s often a thumb-pad (squared teeth) to give you grip. As you push this linear piece past the tang, use your finger to nudge the blade toward its closed position.
If you’re feeling adventurous, use a flick of the wrist or gravity to move the blade. Make sure your thumb is out the way before the blade reaches the handle. Don’t try to go fast when you’re learning the mechanics of these lockups. Once you’re confident, work on building up speed and muscle memory.
Frame Lock Pocket Knives
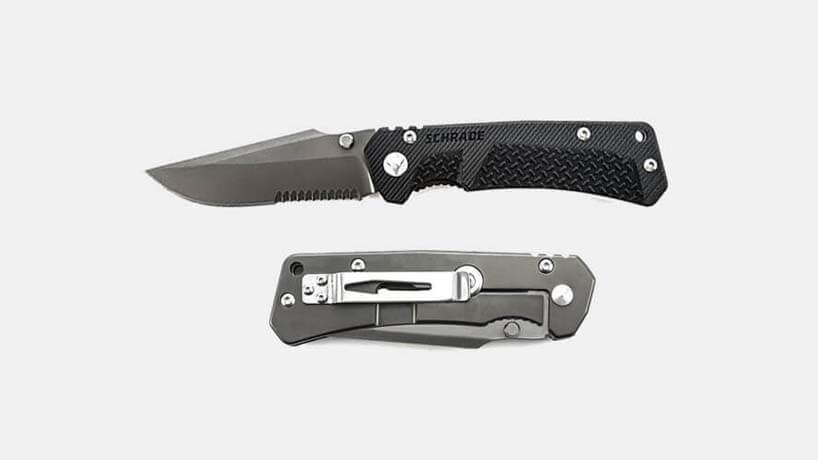
Frame lock pocket knives are very similar to linear lockups. The main difference is that the second linear locking piece is removed. It’s replaced by the frame (usually the inner-side frame). They’re made from two scales and sometimes one linear piece. This piece is never on the locking side and will always be fixed.
These types of pocket knives are very easy to use once you know how much force you’ll need to release the blade. They work the same as a linear lockup. The frame is bent, resting against the closed blade. As you open the blade the frame slips under the tang – locking it in place. To close these knives, push on the thumb-ridge (if there is one) in the same way you would with a linear lockup.
As soon as the frame moves past the locked-in tang, use your finger, gravity, or a flick, to move the blade. Get your thumb out the way quickly. You can tighten or loosen the blade’s action to your liking – though you’ll need to get comfortable with the lockup first. The opening and closing action on frame locks can be lightning-fast with enough practice.
Back Locked/Lockback Pocket Knives
The back-lockup is incredibly sturdy. It trumps both linear and frame locks in this regard. It’s not likely you’ll ever put enough force on the blade to make a lockback fail. You’ll find them harder and slower to open, with quite a steep learning curve. If this is your first time using a lockback pocket knife, you should spend time getting used to the system.
Get familiar with where the lock-release is without having to look at your knife. This takes a fair bit of muscle memory but isn’t too hard to get. One piece of advice; these lockups often have an assisted closing. It’ll snap the blade into the handle when it gets close enough to the handle.
Make sure your thumb and fingers are well out the way before the blade reaches the assist point. They’re made up of a center locking piece with a scale on each side. The center locking piece rises as you open the blade, clicking down into place as the notch in the tang passes.
Once it’s clipped into place behind the blade, you’ll have one of the strongest lockups of any pocket knife. To close a lockback knife, press on the release tab near the base of the handle. As you press it, the blade is released and you’ll need to push or flick it manually to its assisted closing point. The assisted closing action is swift and snappy, so take care.
Mid-Locked Pocket Knives
Mid lock pocket knives have an almost identical locking style to the back lock pocket knife. They have a shorter locking piece and the release switch is near the middle of the handle. You don’t need to do the same finger gymnastics to reach the release button – and the lockup is extremely strong.
You’ll probably have the most secure lockup of the bunch thanks to the shorter locking piece and higher tension hold. The mechanics of opening and closing the blade will be similar to lock back blades. Use your thumb to press the release button and pull the blade down with your hand.
Beware of the snappy assisted closing and make sure your fingers are out the way. These lockups have a simple construction – one locking piece with a scale on each side. They can be quite tough to press. Take some time to get familiar with how much force you need to use. You don’t want to go overboard or you’ll risk losing your grip and letting the knife slip.
Ring/Twist Lock Pocket Knives
This type of lockup has quite a few variations and they’re pretty diverse. We’ll deal with the most common one here. There’s a single locking piece than runs down the spine of the handle. This leads to the pull/twist ring that holds the locking piece in place. This type of lockup on a pocket knife uses a gear-like piece with pronounced teeth.
As you open the blade, the locking piece catches the gear’s teeth and locks the blade in place. It’s unique because you can lock the blade securely at different angles – depending on how many teeth there are in the gear. You’ll find the gear-like piece at the blade’s pivot. This lockup is probably the slowest in this guide to open – and even slower to close.
You’ll need to slip one finger into the ring (index or middle) and pull on it while you simultaneously push on the blunt side of the blade. This motion will release the blade and keep your hands out of the way. It might be tempting to wrap your finger around the handle – but you should avoid this.
Sometimes, as the gear wears or collects dirt, little pieces of sand/grit can make it slip. This combined with the way the blade is released is a recipe for disaster – if your fingers are in the way. Practice opening and closing the blade without getting your hands in the way to build up safe muscle memory.
Lever Lock Pocket Knives

These, along with the ring/twist lock styles are the least common in this list. You’ll find a level and an indentation just before it on the handle (near the neck of the knife). This lever is to be flipped over to unlock the blade. You then press the level down (in its flipped position) to shoot the assisted blade out.
These knives are usually assisted-opening knives and they’re incredibly quick. You can get manual ones though – and you’ll need to use a flick of the wrist or gravity to get the blade moving. Once the blade is out, you need to pull the handle down to its original position to lock the blade in place.
This lockup is very secure – albeit a little on the slow side – and reliable in pocket knives. To close the blade, flip open the level again. Press it in to release the lock. Use your fingers or a flick to start the blade on its way back into the handle.
Final Thoughts
Well done for taking the time to learn the right techniques and tricks! Handling knives the right way can be incredibly fun and rewarding – but disastrous when done carelessly. We’ve taken a look at some of the most popular lockups on pocket knives.
You’ve got a lot of information and guidelines to work with. All you need now is to spend some time with your knife. Start slow and work your way up as your muscle memory. Take what you’ve learned here on how to close a pocket knife and get some practice – good luck and enjoy!


