I love a good stonewashed blade. It looks fantastic and gives this fancy vibe to a blade. I always choose it when I have a chance to show off my knives to a friend. It’s not only great looking but it’s also tougher than a normal stainless steel blade. A stainless steel knife with a polished finish shows scratches way easier. I’ve had a problem with it in the past, so I’ve resorted to stonewash finishes.
You can’t go wrong because it blends in all those marks on the surface that you wish to hide. It also gives a darker color to the etching on the blade which looks great. Stone washing your knife doesn’t take away the risk of damage but it does make it much more durable in the long term. So it’s handy for all your hunting, outdoors, or tactical blades.
You won’t affect the sharpness of the knife if you decide to stonewash it. This is one of the biggest plus factors for me. So let’s jump right in and discuss the methods and processes behind stone washing knives.
How To Etch A Knife
The first thing that you do to a blade after refining it, is to etch your logo or emblem onto it. You can do this via a DC or AC electrical etching machine. An etching machine is quite simple to use if you have the right items. You’ll need ionized ink with a small etching stamp of your logo. You’ll charge the ink with electricity so that it bonds to the blade.
First, dip your stamp in the ink. Make sure you cover the whole logo and then make ready your power supply for the machine. You’re going to start with DC power. Make sure you connect everything safely. Turn on the machine and get ready to stamp. try to align it in the right place, then push it down onto the steel. The etching machine will do its job after pushing it down.
Hold it down for a few seconds and then switch to AC power. Hold it in place for another few seconds and then let it up. It should be nice and dark with clear lines and shapes. Now you’ve etched your blade and you’re ready to move onto the acid washing step.
How To Acid Wash A Knife

For this step, you’re going to wash the knife first with soap and hot water. This cleans off any residue that might cause a volatile reaction in the acid. Soap is an alkali substance that will neutralize any problematic compounds. Wash thoroughly for 2 minutes, then leave it to air dry. When it’s dry you’re ready to rock and roll with the acid.
You’ll need a wire to hook the knife onto because you don’t want to be putting your hand into the acid. A wire of 10 cm will do fine. Bend it into a hook shape and thread it through a hole in the tang of the blade. You will suspend the knife while holding the wire. Then using this technique you can go ahead and dip the knife into the bottle of acid.
Leave it there for 2 minutes. After this time take it out and wipe it down with steel wool. This makes sure that your etch is clear and unaffected. Now place the knife back into the acid with the wire grip. Repeat this process every 2 to 3 minutes of the acid washing step.
By doing this you are ensuring that any contaminants that find their way onto the blade get scrubbed off. You must do this in regular intervals before they can do any real damage. Another tip to consider is to give the blade a little swirl when you put it into the bottle of acid. This gets rid of any air bubbles that might’ve formed on the blade when taking it in and out.
The whole acid wash time frame should be 9 to 12 minutes long. If you’re using a new solution of acid then you can draw this time down to about 7 or 8 minutes.
Neutralize The Blade
After your time frame is complete you need to wash the blade down with a basic solution. This is to stop the acid from eating away at the steel on the blade. You can use Windex or baking powder for this step. Spray it down with Windex and then wipe it around the knife using your fingers. This should take about a minute or so and then do the same with the baking powder.
You don’t have to use both but it is advisable. It makes you more certain that there is no more acid on the blade that can damage the finish. You worked hard to achieve a beautiful finish so you wouldn’t want to throw it away.
How To Black Wash A Knife Blade
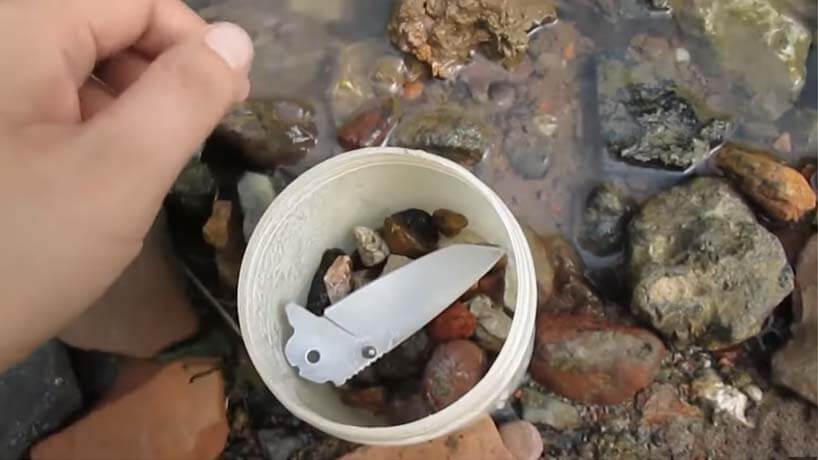
Now onto the final step of the process. We’re going to bring in the rocks to give the blade a bit of a black finish. Hence the name black wash. You’re going to need to make a tumbler out of PVC pipe. Take a PVC pipe of diameter 10cm and cut a length off. The length of the piece should be longer than the length of your blade.
Attach two lids to the top and bottom of the pipe to seal it off. You’re going to throw a whole load of small rocks and stones into it. Make sure that the PVC pipe isn’t weak or too thin to withstand a fair bit of shaking. Head out to your nearest garden store and buy some river pebbles. If you want to find them yourself from a stream nearby then that’s also fine.
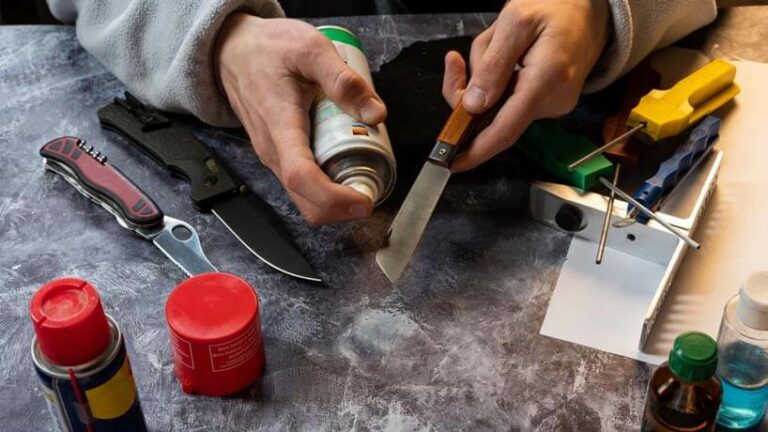
Fill the tumbler to about one-third and place your blade inside. Before shaking the tumbler you should spray the blade with some WD-40 to protect against rust. This is not a must but is a precaution that is smart to take. The whole point of making a tumbler with stones is to mark your blade with little spots.
This distributes an even surface of marks on the blade without causing any damage to the blade. The acid coating that you’ve washed into the blade is dark in color. When the stones contact the blade with a bit of force it breaks up the acid surface creating a lovely dark pattern.
Shake the tumbler with the blade inside for about 4 to 5 minutes. Feel free to use as much force as you wish. Be careful to hold the tumbler by the lid otherwise the stones and blade will fly out. After this is complete, you can take out the blade. You’ll first have to polish the knife with a cloth and some WD-40. The finish will come alive after this and you’ll be able to see the end result.
If it doesn’t look quite right then you can put it back in the tumbler for another few minutes. Then wash off again with WD-40. You should see a beautiful dark surface with a robust look and feel to it.
Conclusion
Now that you’ve learned how to stonewash a knife, go ahead and try out all the steps. Buy your equipment and get started. It’s not complicated at all, but rather quite enjoyable. Start with a dummy knife or piece of steel that you won’t be needing. Attempt to process the knife according to our steps and if you don’t like it then stop and forget it.
We’re that confident that you’ll love the end product. It might not be perfect the first time you try. It’s like they say – if at first, you don’t succeed, try, try again. Once you’ve got the hang of it you’re ready to try on a real blade. Be careful to treat the blade with respect. This means that you should do each step with a fine touch of finesse.
Using new acid, new stones, and new steel wool will help the finished blade to look that much better. You don’t have to get new items every time to get a brilliant finish but it does help. It also makes the process faster which is great if you’re a busy person.
A cool way to increase the efficiency of the shaking of the tumbler is to use an electric drill. Glue a thick drill bit into the bottom end of the tumbler. Drill a hole, fit it in, and glue it closed. Have the end of the drill bit sticking out so you can connect the drill to it. Plug the drill in and start it spinning at a low RPM. This will get your final finish done in the nick of time.


