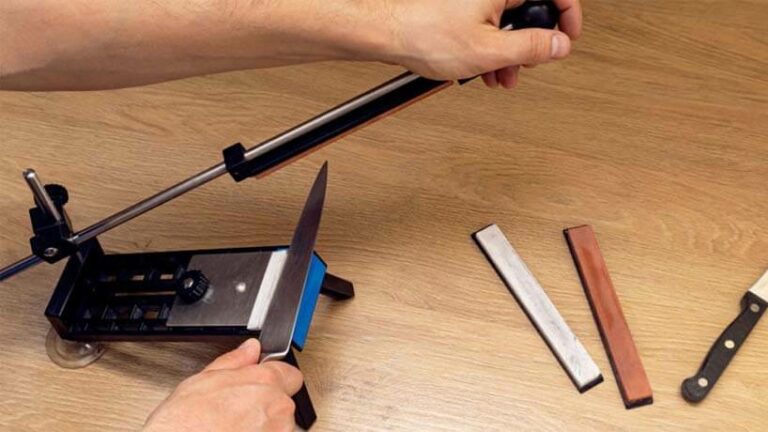
We’ve all had run-ins with blunt knives. They’re one of the biggest impediments to improving your performance in the kitchen. If you’ve ever tried to finely slice a tomato with a blunt knife – then you know what I’m talking about. In this guide, we’re going to break down and rectify some of the common misconceptions around honing and good honing techniques.
We’re also going to show you why honing isn’t the same as sharpening, and which one is best for your knife. You’ll learn about the different types of honing steels and which one suits your current skill and comfort level. We’ll also chat about the different steel shapes and how they’ll affect the results you get.
By the end of this guide, you’ll be ready to choose a hone that’s perfect for your knife and setup. You’ll learn the correct honing technique to protect your equipment and your fingers. We’ll also cover topics like how frequently you need to sharpen your knives to keep them at peak performance. Let’s jump into the guide!
What Is a Honing Steel?

A honing steel is made up of steel core and a carefully chosen coating. Most honing steels come in the form of a rod, offering you different shapes to choose from (oval, round, squared, etc.) depending on the type of knife you’re working on.
Most modern honing rods have a rubber-coated tip that’s meant to be placed down on a solid surface to help you better secure the rod while working with it. There are quite a few different types of honing rods, with the most common one being steel. Almost all honing rods have solid steel cores though, regardless of how they’re coated.
This solid core helps to keep the hone steady and adds quite a bit of robustness to the overall construction. It’s this added heft that stops the extra swaying as you draw the knife down the steel. There are 3 main coatings; ceramic, steel, and diamond. Ceramic and steel hones are very non-abrasive, meaning they aren’t going to take any steel off your knife’s edge.
Diamond-coated steel hones, on the other hand, are most likely to remove some steel from your knife – especially if you don’t know 100% what you’re doing. Steel and ceramic hones use very fine-grain textures to protect and realign your knife’s edge with minimal effort and skill on your part.
When it comes to choosing the hone rod shape, I prefer to go with the oval-shaped rods. They have a larger point of contact with the knife, as opposed to the smaller point with round and triangular rods. With all this in mind, let’s take a look at the purpose of honing steels.
What Is the Purpose of a Honing Steel?
Honing steels are used to realign the cutting edge of a knife. Through normal use, your knife’s cutting edge gets tiny chips, bends, and dents along its length. Over time, this damage compounds and makes the knife blunter. Eventually, your cutting edge will be so misaligned that it’ll struggle to cut through a piece of paper or the skin of a tomato.
Honing is done at the same angle that the knife is sharpened (often around 20° – but this depends on the knife) to make sure the cutting edge is aligned perfectly. Honing steels use fine-grain surfaces to gradually push the misalignments back in-line with the rest of the cutting edge.
Sharpening and honing go hand in hand. You need to hone your knife after each time you sharpen it. Newly sharpened knives very seldom have straight cutting edges, which is why you need to realign everything before taking the knife back to the cutting board!
What Is the Difference Between Honing and Sharpening?
This is where honing is most commonly misunderstood. Let’s make something clear right now – honing is NOT the same as sharpening! Sharpening a knife involves using another substance (a whetstone for example) to physically remove some steel from the knife. Sharpening peels back a few layers of the knife’s edge, revealing new and fresh steel.
Even after sharpening a knife’s edge it still needs to be honed. Honing refers to the process of realigning and straightening a knife’s edge. As a knife goes through normal use, tiny microscopic chips and bends form along its cutting edge. This is what makes your knife cut like it’s blunt.
Sharpness is decided by how thin and straight the cutting edge is. Thinner and straighter edges cut smoother and sharper. Honing uses another surface (not rough or tough enough to remove the steel) to draw across the knife’s edge at a particular angle, setting the edge straight again and flattening any bends and tiny chips.
Honing can be done as often as you’d like, whereas sharpening your knife too often will eventually do more damage than good. Every knife is sharpened at a specific angle and with a particular grain. Every time you sharpen it, you remove some of this grain – and doing this too often will almost render the knife useless.
How to Use a Honing Steel for Knives
You’ve probably seen professional chefs on TV holding a honing iron up the air, whipping a shimmering knife across it with magnificent speed and finesse – but this isn’t what you should be doing. While this flashy method works, you need to remember that these chefs often have decades of experience, trial and error, and muscle memory behind them.
They know the perfect honing angle for every knife in their arsenal, how many strokes each knife needs, and have mastered the wrist arcing action and honing technique – and even they make mistakes from time to time. To minimize the risk of losing a couple of fingers, or ruining your expensive premium knife, here’s a basic but effective honing technique.
Step 1: Secure the Hone
This is why many hones have a rubber tip. Place the rod vertically, with the tip secured on a hard and flat surface. Place your non-dominant hand around the handle and hold the rod firmly in place.
Step 2: Use the Right Honing Rod
Make sure the honing rod is at least 2” longer than the length of your knife (if you’re honing an 8” knife, use a 10” steel). Stay away from diamond hones if you aren’t 1000% confident you know what you’re doing. Choose a hone with the right shape. I recommend the oval-shape, but the round shape will do just fine.
Step 3: Find the Correct Sharpening Angle

The correct sharpening angle varies depending on your knife. For most western and European (German knives), you’ll hone them at a 20° angle. Most Japanese knives are honed at 15° angles down to as low as 10°. Place the side of the knife flat against the hone. Raise its spine off the rod, making sure the cutting edge keeps contact.
Stop when you reach the honing angle for your knife. Make sure the butt of the knife is pressed right up against the top of the hone rod’s length. This ensures we hone the whole cutting edge in one stroke.
Step 4: Good Honing Technique
A good honing technique starts in the wrists. Make sure you’re starting at the portion of the blade closest to the handle and that you start each stroke at the top of the honing rod (next to the handle). Always hone into the cutting edge and away from your body. Hold the knife just in front of the bolster so that your finger is touching both the blade’s steel and the handle at the same time.
In one steady and angle-consistent motion, draw the blade down the honing steel, moving along its edge toward the knife’s tip. A good stroke will make contact with the entire cutting edge before running out of space on the steel rod. Use your wrist to control the motion of the blade and don’t tense it up.
Relaxing your wrist will help you keep the speed and pressure consistent. Once you’ve done one stroke, repeat the same process on the opposite side of the cutting edge. Always alternate between sides to make sure the edge is aligned evenly.
How to Test the Sharpness of a Knife
Simply cut through a piece of paper. As you cut through it, make sure the knife isn’t dragging at all – it should glide through the paper. You can repeat this cut on different sections of the cutting edge to make sure everything is evenly sharp.
If the paper tears instead of cuts, it means your knife isn’t sharp enough. If you’ve already honed it and it doesn’t cut well, it means you need to sharpen your knife. This can be done by a professional or DIY at home with the right tools.
Final Thoughts
Well done for taking the time to learn the right technique and get informed. Try to be patient as you work on your honing technique and consistency. Like all things, it takes time and experience. So long as you have the right tools and a decent quality knife, you should be able to successfully hone your knife with the information in this guide.
Take what you’ve learned on how to use a honing steel and go get some practice. Grab an old knife or two, good honing steels, and try to improve their cutting power – you’ll be doing it like the pros in no time! Happy honing!


